Installation Instructions

WideFootrest

Installation Instructions
The wide footrest
Fitted to the bike
Fits STACYC 12eDRIVE16eDRIVE
About 15 minutes
Adult assembly required
Basic hand tools
CUSTOM BUILT. ENGINEERED RIGHT.LD-STY-FP-001 · October 2026
START

Before you start

In the box

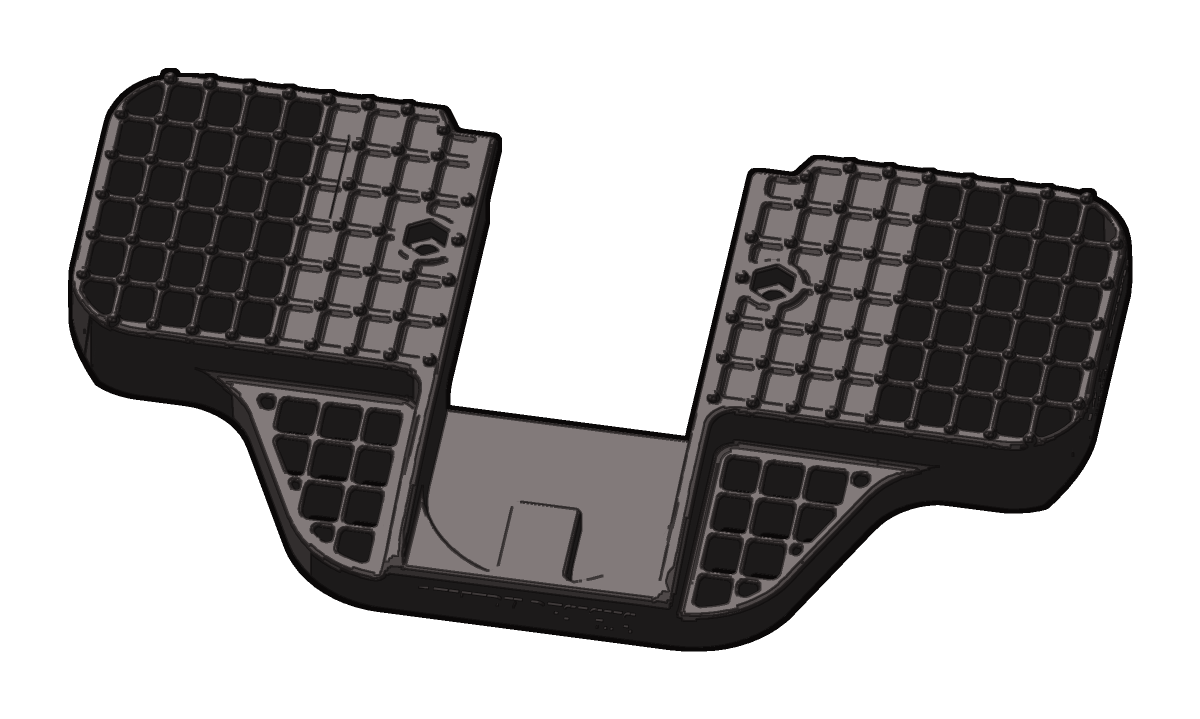
×1 Wide footrest
Wide footrest
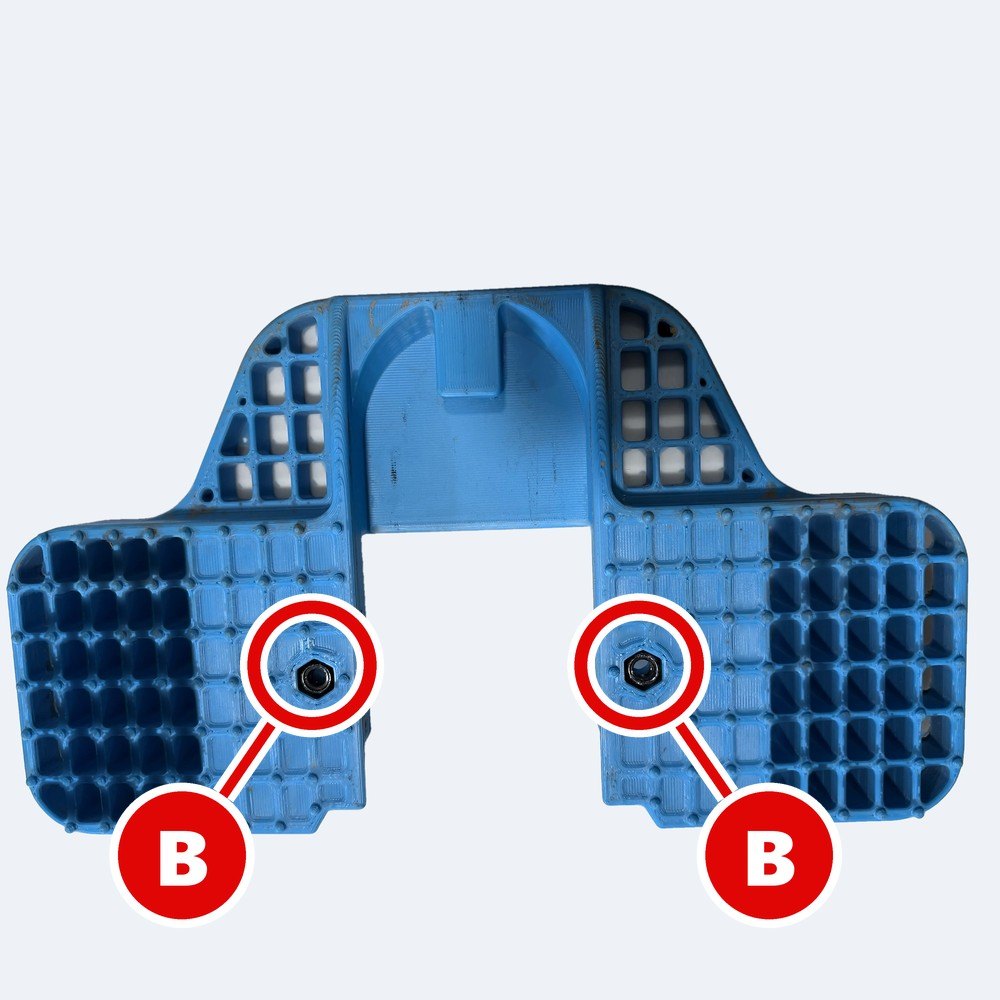
Nuts B press into its two hex pockets (step 5).
LD-STY-FP-001
No hardware in the box
Your bike’s own bolts A and nuts B hold it on.

From your bike

A
2 stock bolts
Keep them. They hold the new footrest on.
B
2 stock nuts
Keep them. They go into the new footrest.
Stock step
Not used again. Keep it if you might switch back.

Tools you need

4
4 mm hex key
Clean cloth
WARNING
PART 1

Take off the stock step

OFF
STEP1

Battery out

  • Turn the bike OFF.
  • Take out the battery.
STEP2

Flip the bike

  • Turn the bike upside down.
  • Rest it on the seat and handlebars.
TIPA towel under the seat and grips stops them getting scuffed.
Bolts A out
STEP3

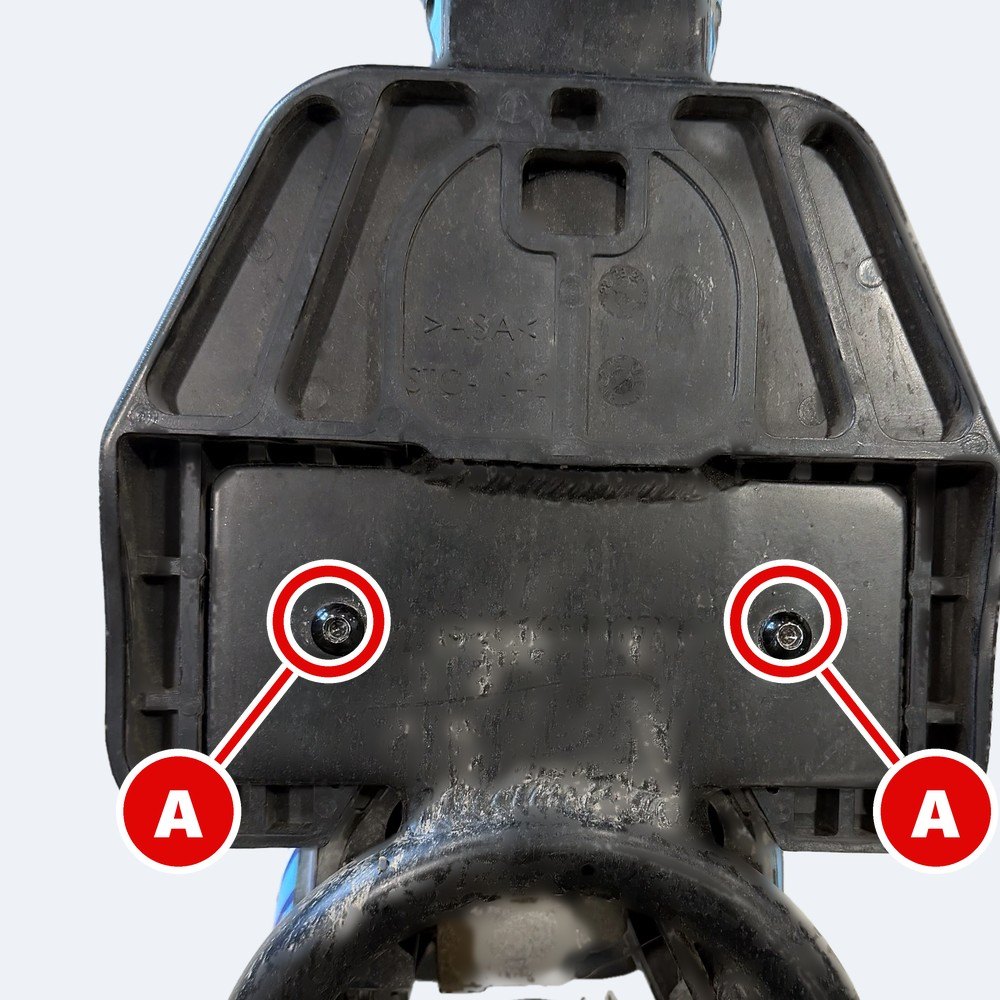
Bolts A out

  • Remove both bolts A from the steel plate with the 4 mm hex key.
IMPORTANTStock nuts B can fall out of the step once bolts A are out. Catch them.
TIPKeep bolts A and nuts B together. They all go back in.
Stock step off
STEP4

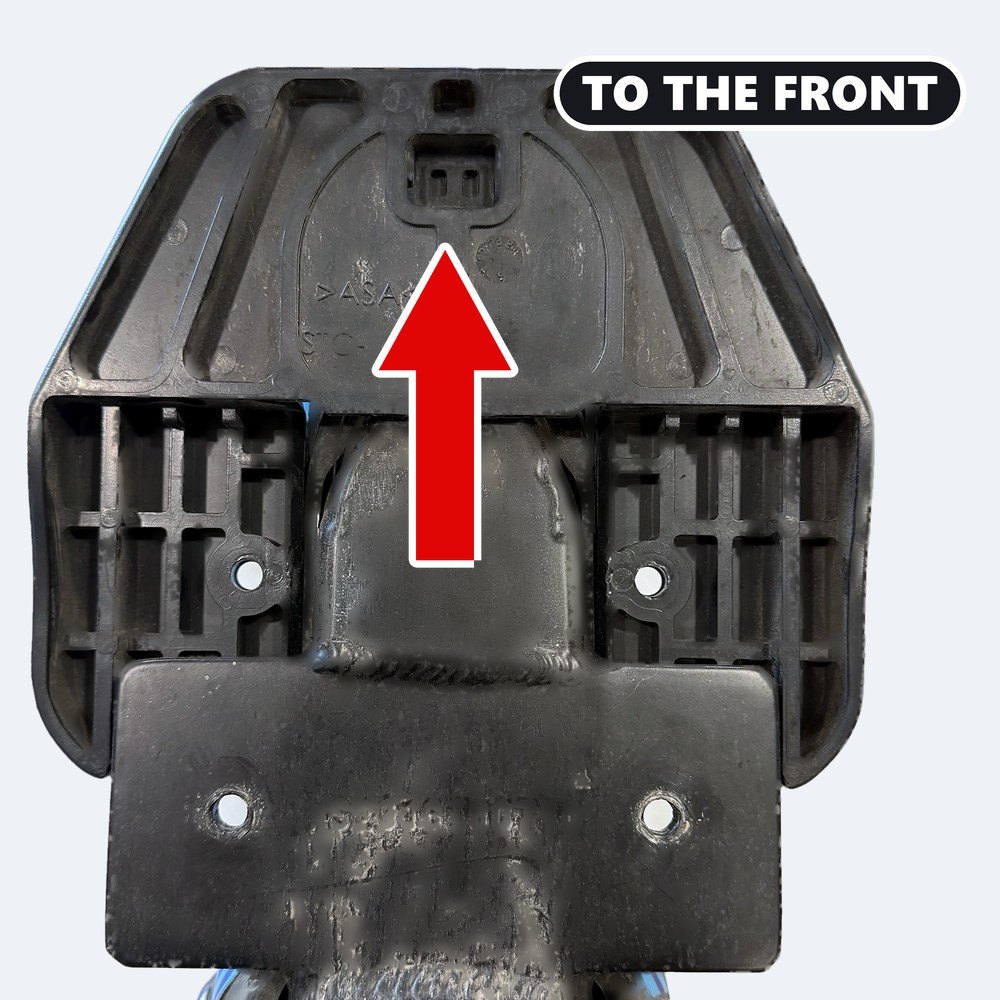
Stock step off

  • Slide the stock step toward the front of the bike, off the steel plate.
  • Then lift it off the frame.
PART 2

Fit your wide footrest

Nuts B in
STEP5

Nuts B in

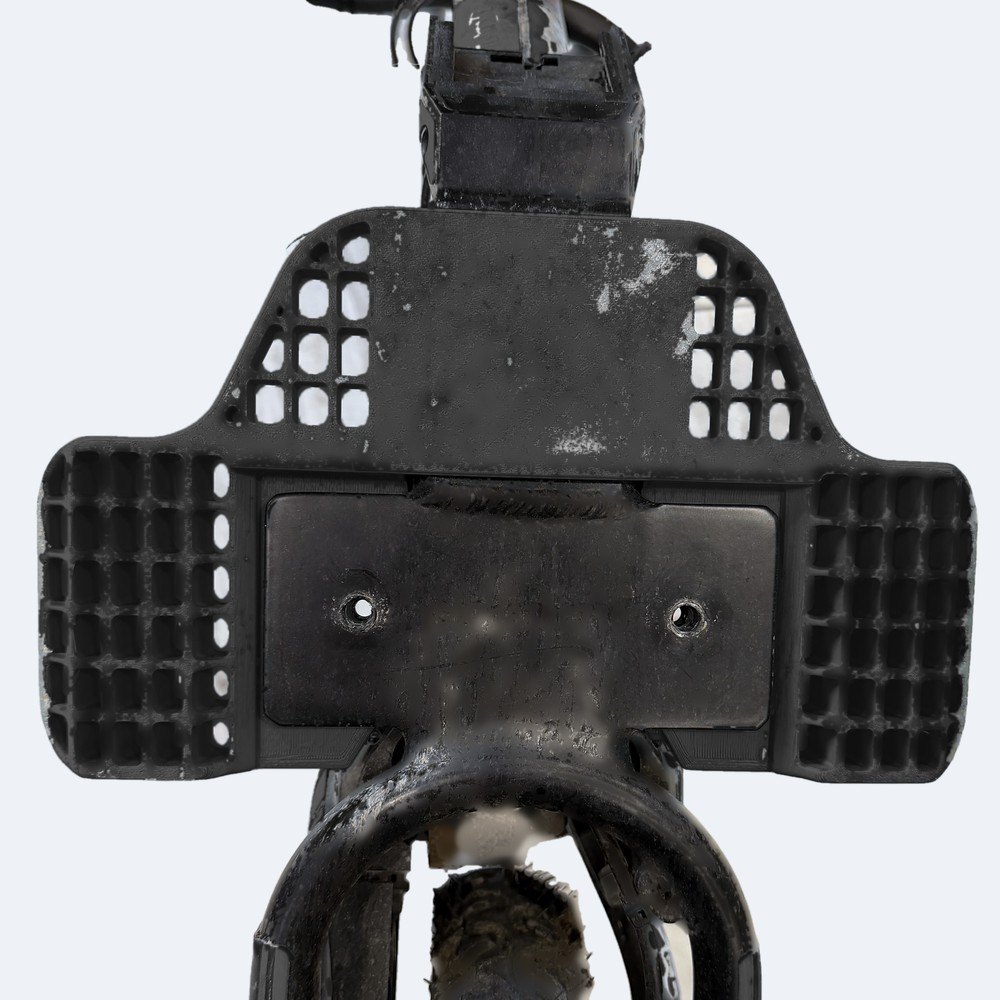
  • Press nuts B into the hex pockets on the top of your footrest.
  • Push each one in until it sits flat.
IMPORTANTNuts B must sit flat and must not spin.
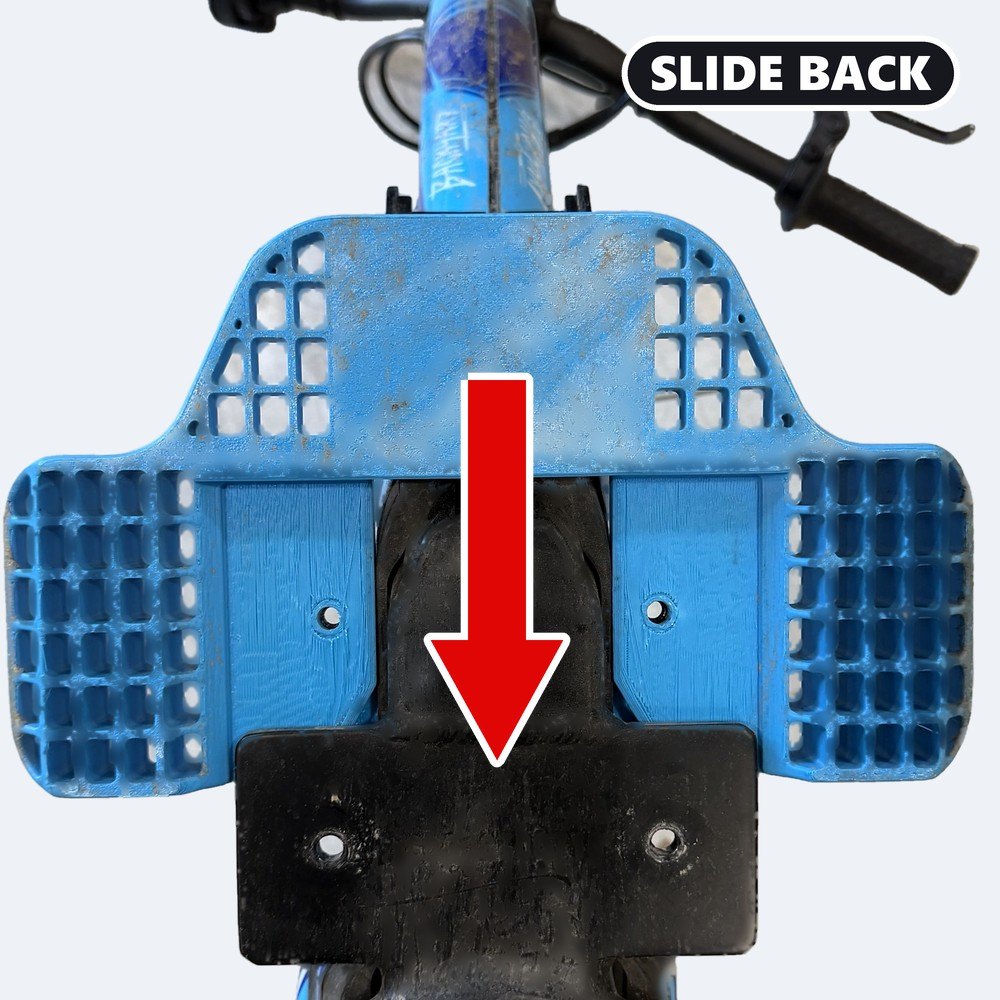
Footrest on
STEP6

Footrest on

  • Keep the bike upside down. The top of the footrest faces the floor.
  • Fit it over the frame the way the stock step came off.
  • Slide it back onto the steel plate.
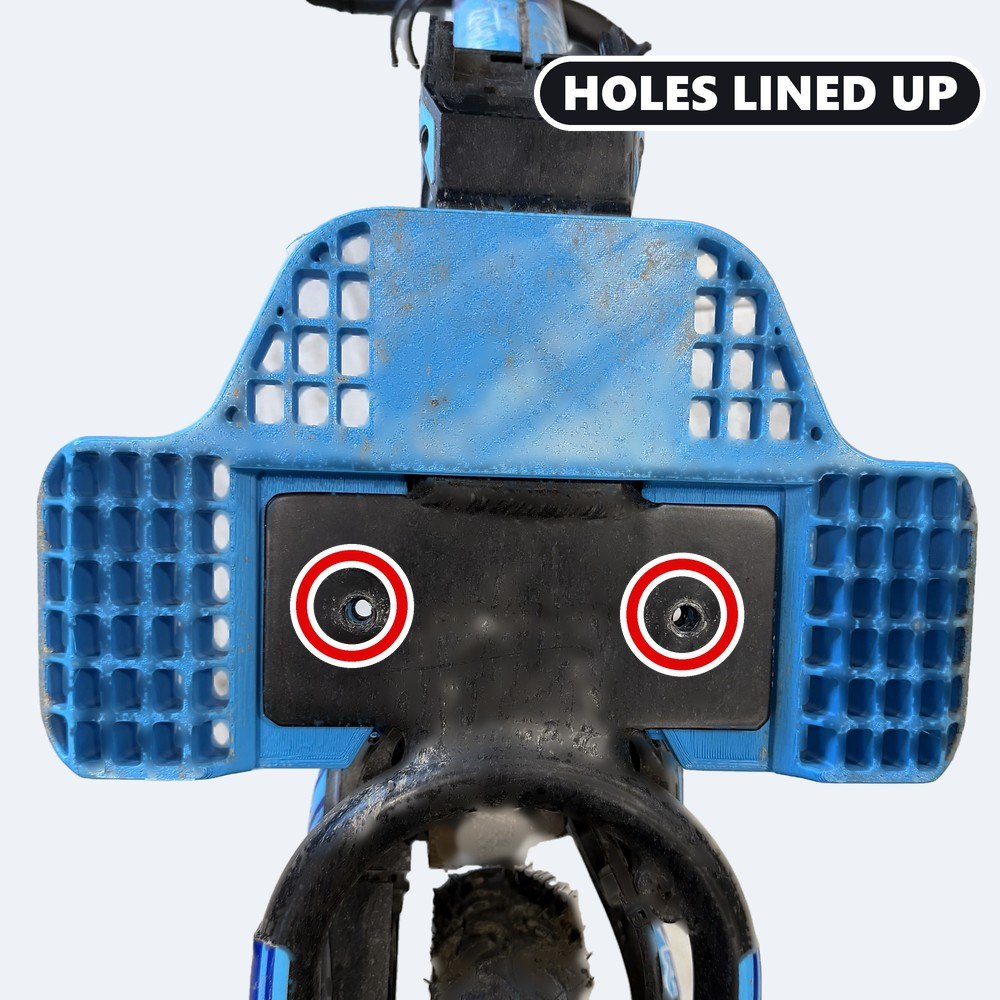
Line up the holes
STEP7

Line up the holes

  • Slide until both holes line up with the holes in the steel plate.
A 4 mm
STEP8

Bolts A in

  • Put bolts A through the steel plate into nuts B.
  • Start both by hand.
  • Tighten with the 4 mm hex key, a little on each side in turn, until snug.
IMPORTANTDon’t over-tighten. Nuts B are held in plastic and can spin or pull out.
STEP9

Flip it back

  • Turn the bike right side up.
  • Put the battery back in. Check the bike turns ON.
STEP10

Test it

  • Push down hard on each side.
  • Nothing should move or flex.
  • Spin the back wheel. Nothing should rub.

Check before every ride

Need help?

Questions, missing parts or something not right? Email us before you ride.

Keep these instructions for future reference

CUSTOM BUILT. ENGINEERED RIGHT.
LD-STY-FP-001 · October 2026