Installation Instructions

WideFootrest

Installation Instructions
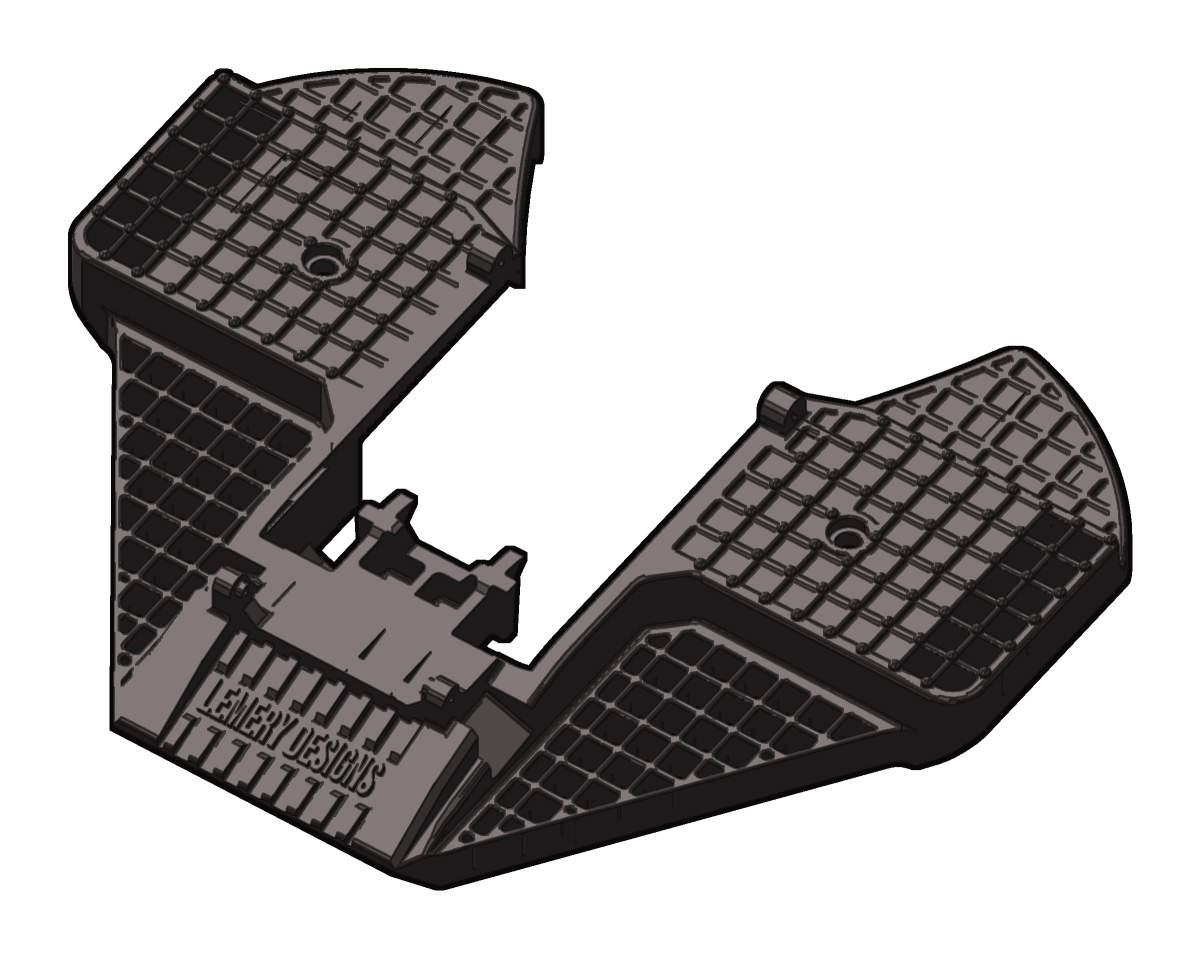
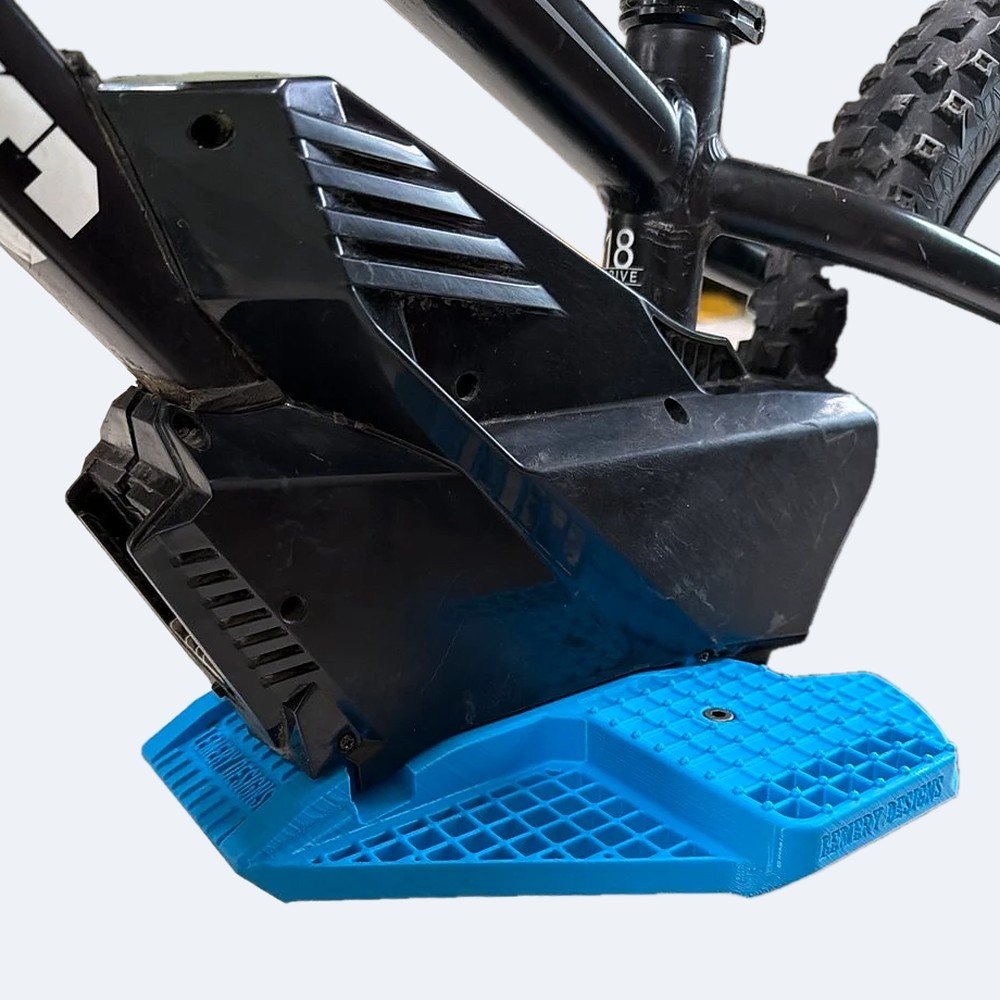
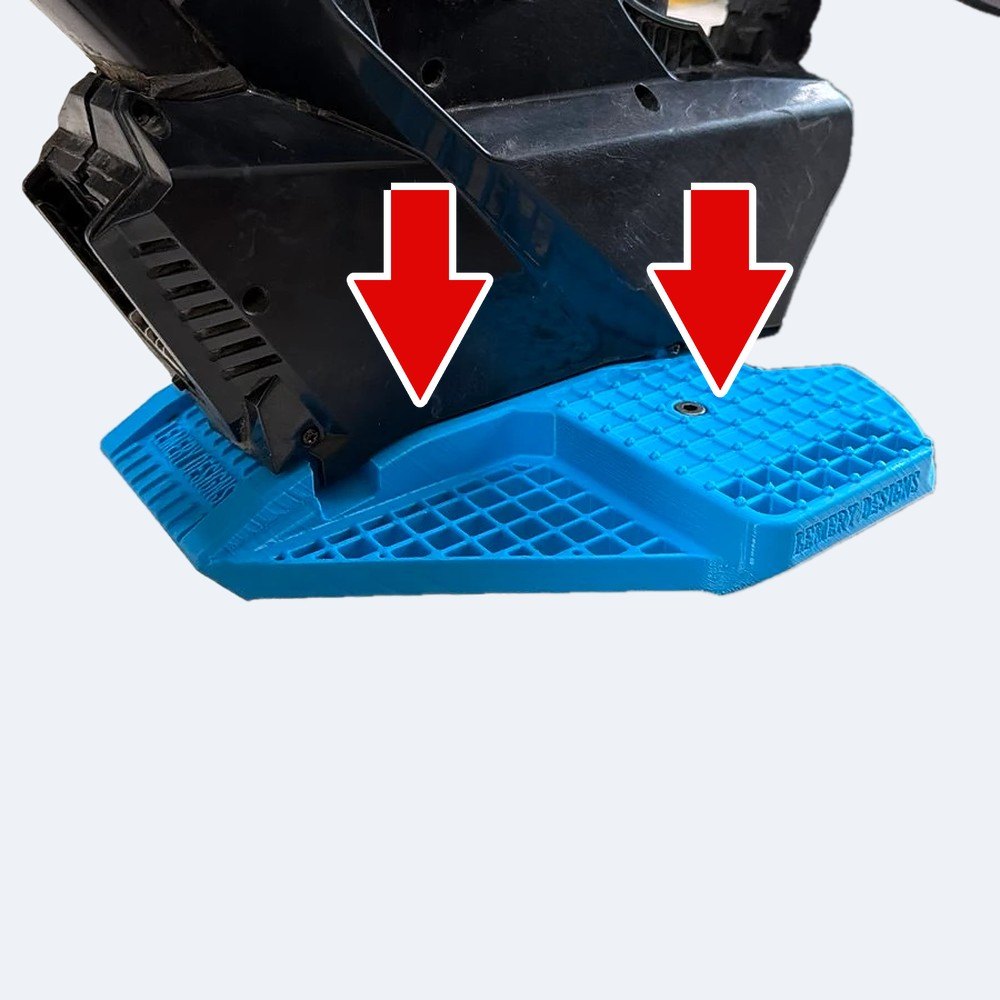
The wide footrest
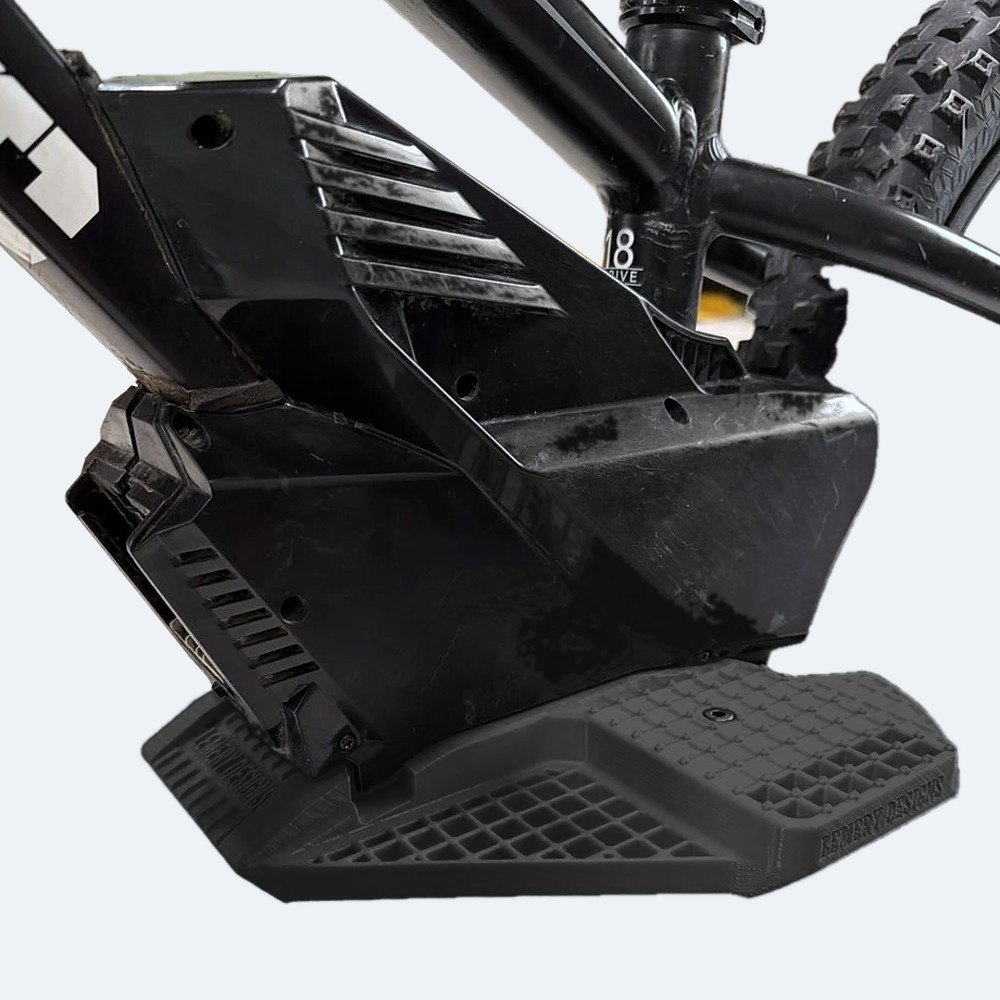
Fitted to the bike
Fits STACYC 16eDRIVE Elite18eDRIVE20eDRIVE
About 30 minutes
Adult assembly required
Basic hand tools
CUSTOM BUILT. ENGINEERED RIGHT.LD-STY-FP-002 · October 2026
START

Before you start

In the box

×1 Wide footrest
Wide footrest
LD-STY-FP-002-01
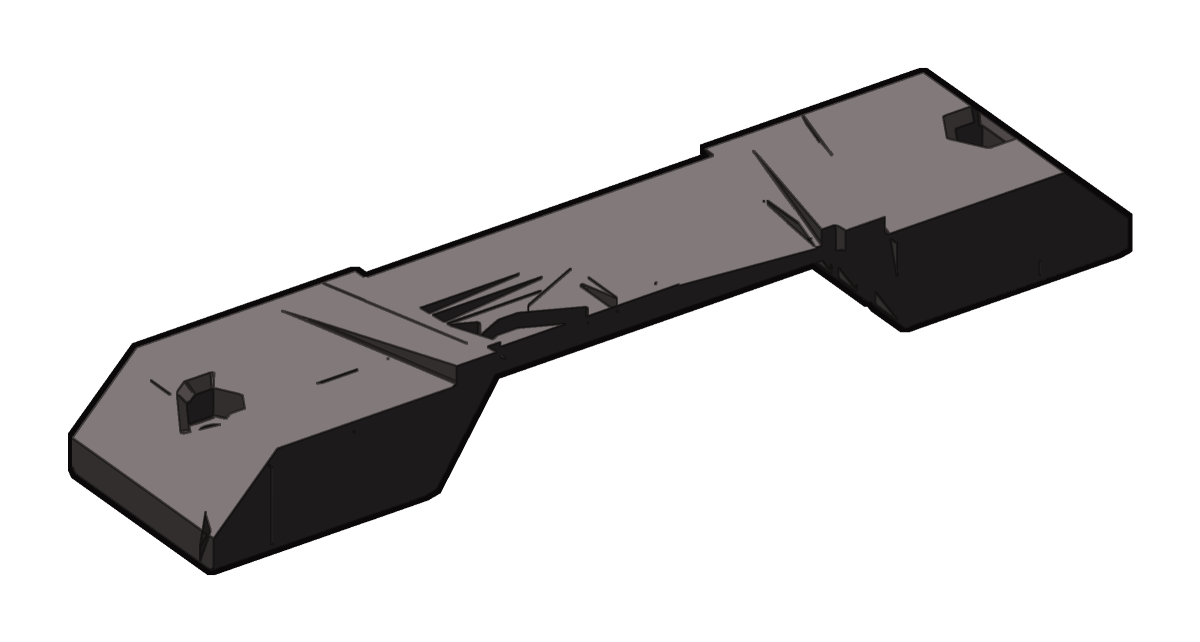
×1 Brace
Brace
Marked FWD ↑. Lock nuts D come fitted.
LD-STY-FP-002-02
C ×2
M6 × 25 mm screw
Low-profile, 4 mm hex. One per wing.
LD-HDW-M6X25-LP-001
D ×2
M6 lock nut
Nylon insert. Already pressed into the brace.
LD-HDW-M6-NYL-001

From your bike

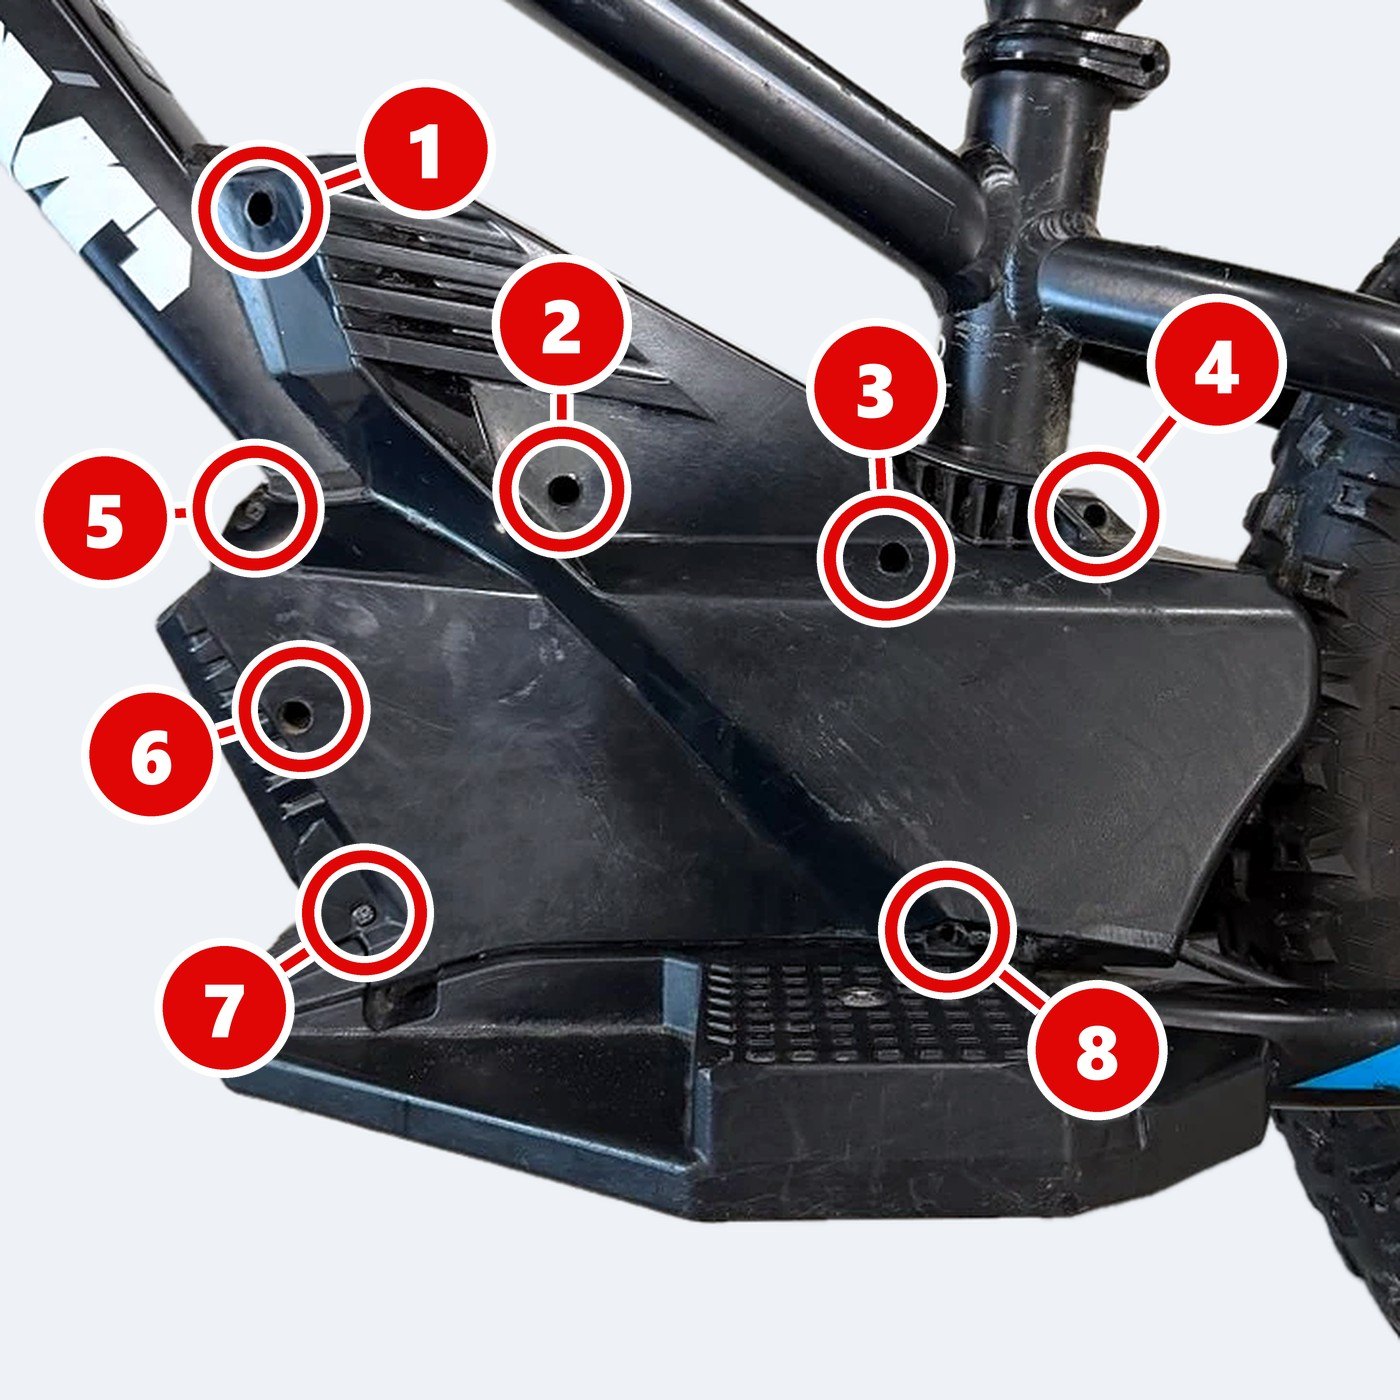
1–8
Side-panel screws
Keep them. They all go back in.
AB
Stock screws + bottom brace
Not used again.

Tools you need

#2 Phillips screwdriver
Flat-head screwdriver
4
4 mm hex key
Clean cloth
WARNING
PART 1

Take off the stock step

OFF
STEP1

Battery out

  • Turn the bike OFF.
  • Take out the battery.
Panel screws out
STEP2

Panel screws out

  • Remove screws 1 to 8 with a #2 Phillips screwdriver.
IMPORTANTScrew 8 is hidden low down. Don’t miss it!
TIPKeep all 8 screws together. They go back in at the end.
STEP3

Separate the panels

  • Gently pull the two side panels apart.
IMPORTANTSupport the motor controller (ESC). The panels hold it up, so it can flop down on its wires.
IMPORTANTNote which way the battery pins face. They slide into both panels and must go back the same way.
TIPScrews can drop out as the panels come apart. Catch them.
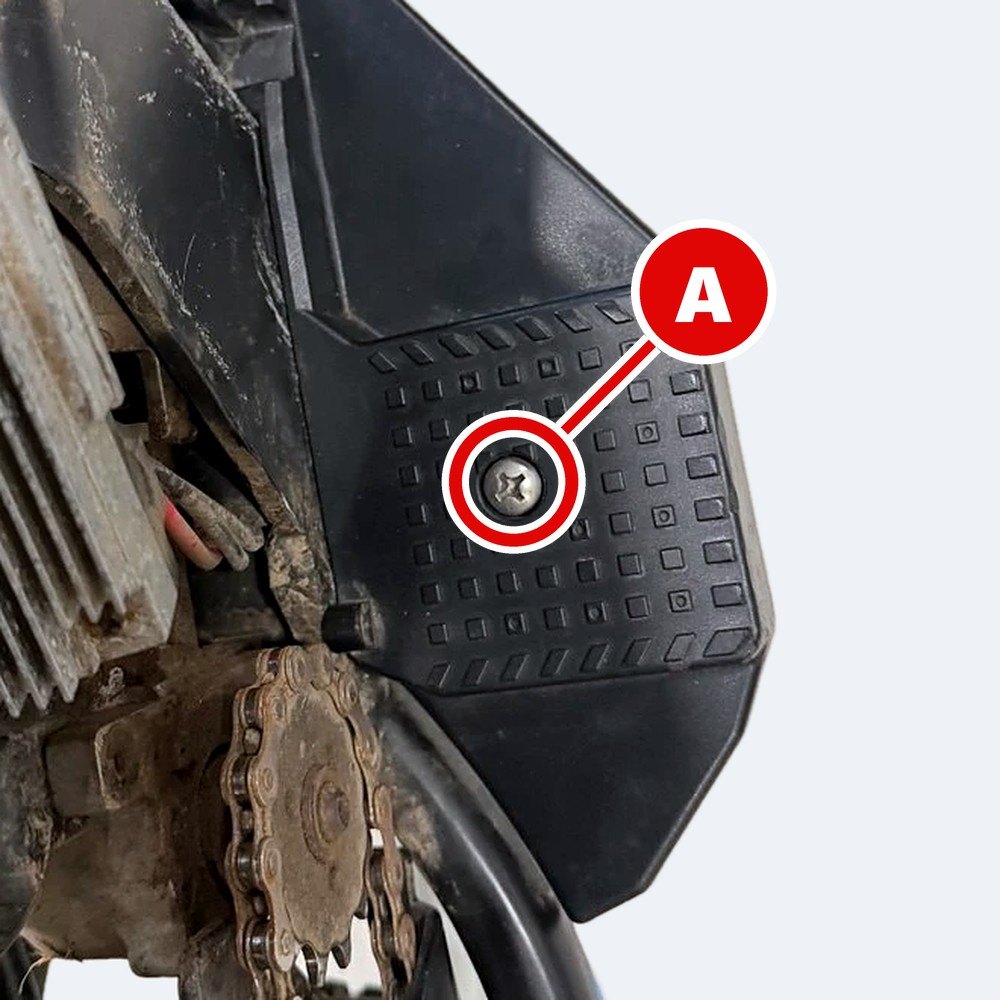
Screw A out
STEP4

Screw A out

  • Remove screw A from the top of the step.
  • It is on the chain side.
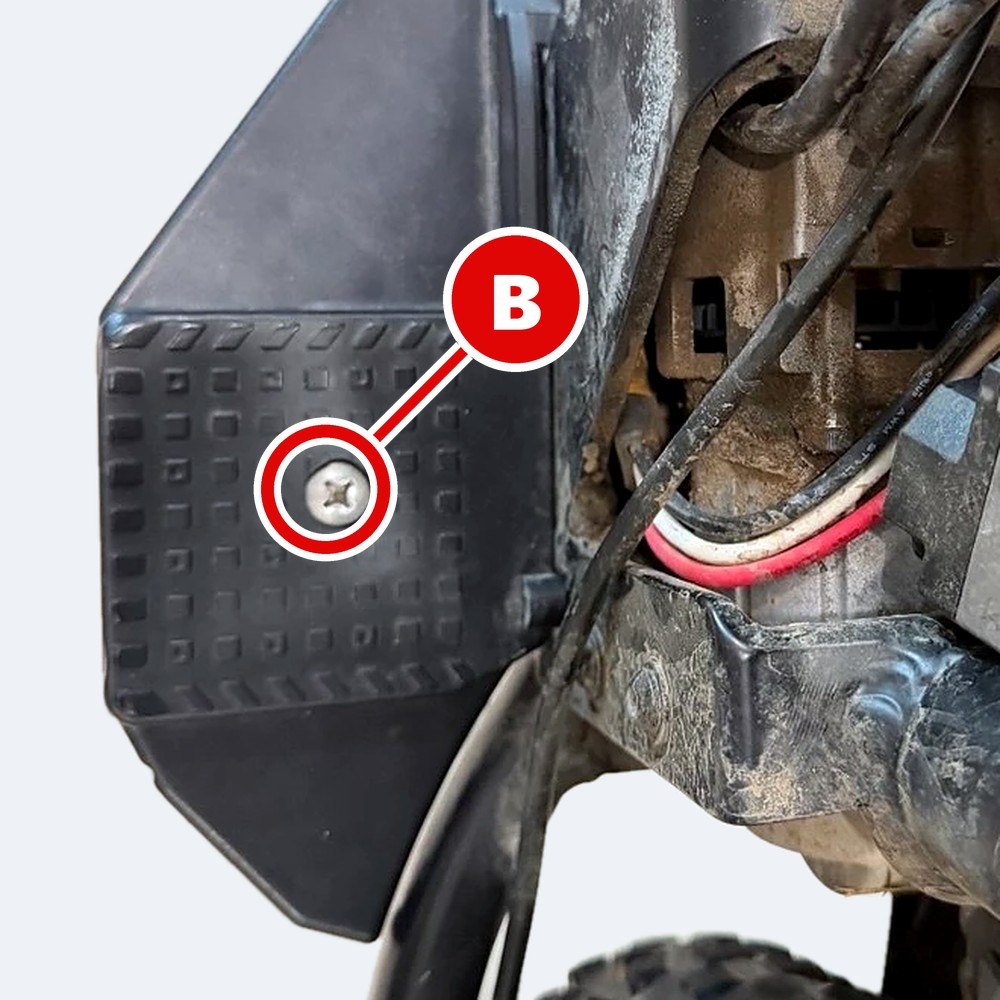
Screw B out
STEP5

Screw B out

  • Remove screw B on the other side.
The stock bottom brace underneath may drop out. That’s fine — it is not used again, and nor are screws A and B.
STEP6

Flip the bike

  • Turn the bike upside down.
  • Rest it on the seat and handlebars.
STEP7

Remove the bottom brace

  • Take out the stock bottom brace.
  • It may have already fallen out. If so, skip this step.
TIPTight? Pry it out with a flat-head screwdriver.
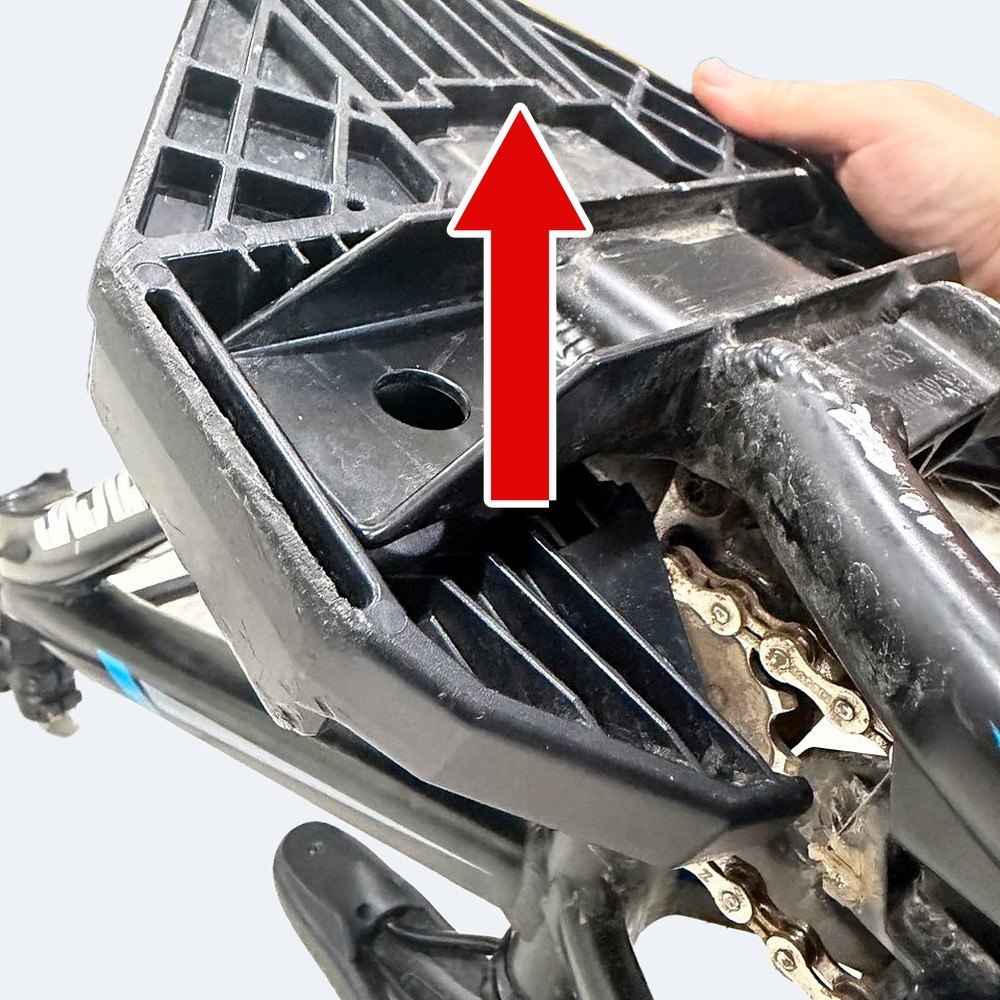
Stock step off
STEP8

Stock step off

  • Tilt the stock step at an angle to clear the metal bracket underneath.
  • Then pull it out.
TIPIt can be a tight fit. Check screws A and B are all the way out, then keep working it free at an angle.
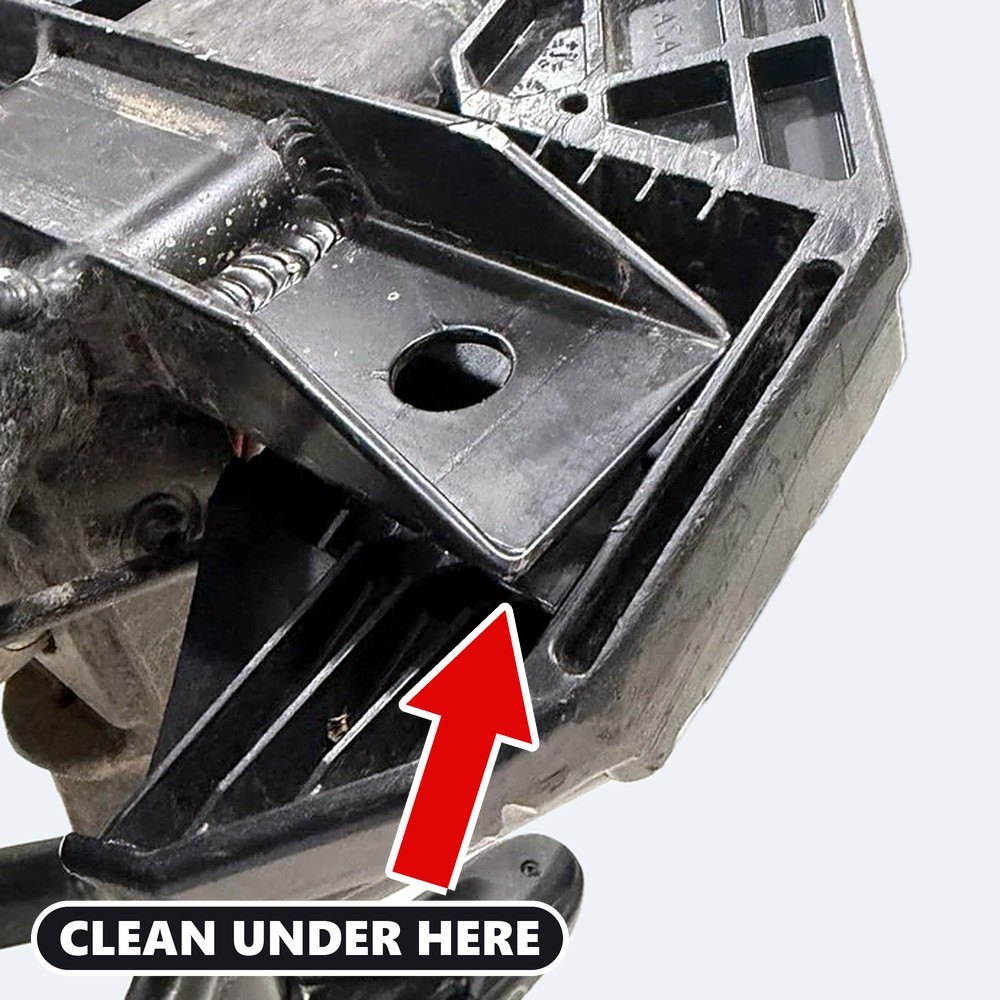
Clean under the bracket
STEP9

Clean under the bracket

  • Wipe clean under the metal bracket, where the arrow points.
  • Dirt and grit collect here.
Dirt left here can let screws work loose.
PART 2

Fit your wide footrest

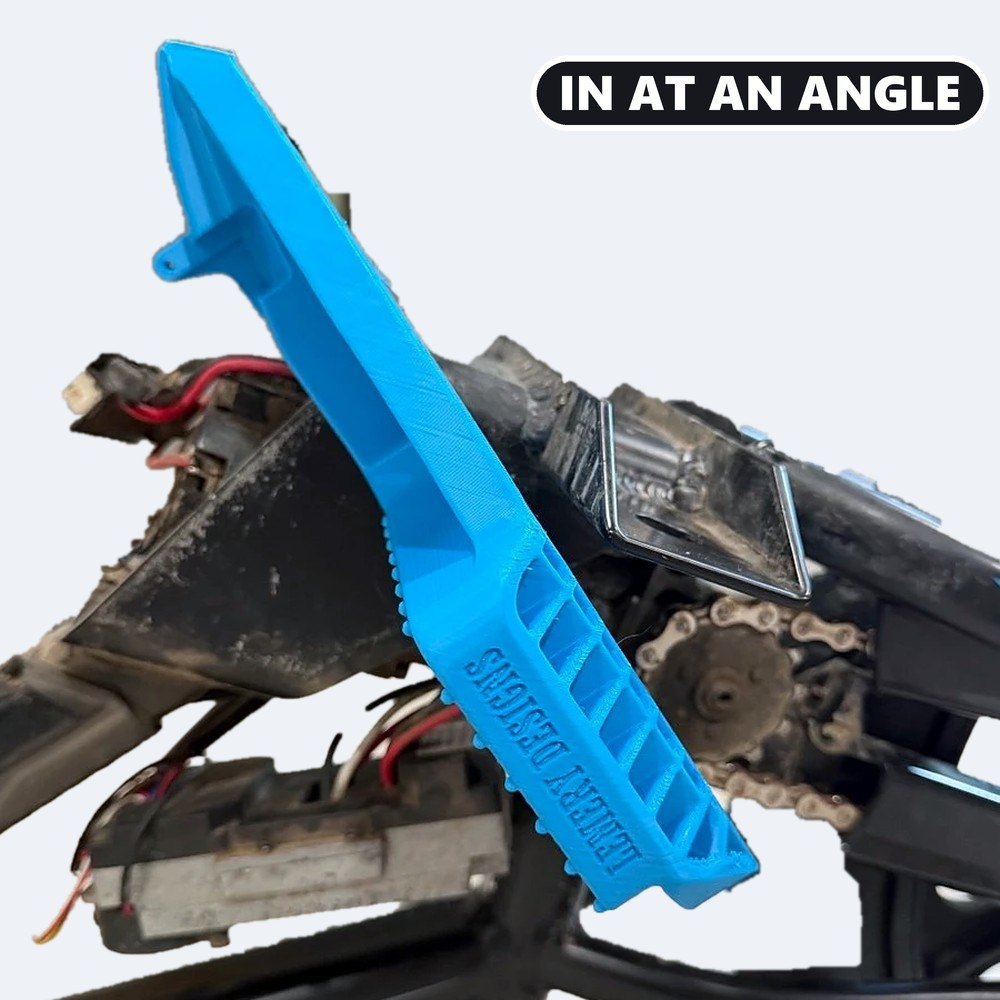
Footrest in at an angle
STEP10

Footrest in at an angle

  • Hold the footrest at an angle, the way the stock step came out.
  • Feed it into the frame and push it in.
TIPIt can be a tight fit. Keep working it in at an angle.
Rotate it level
STEP11

Rotate it level

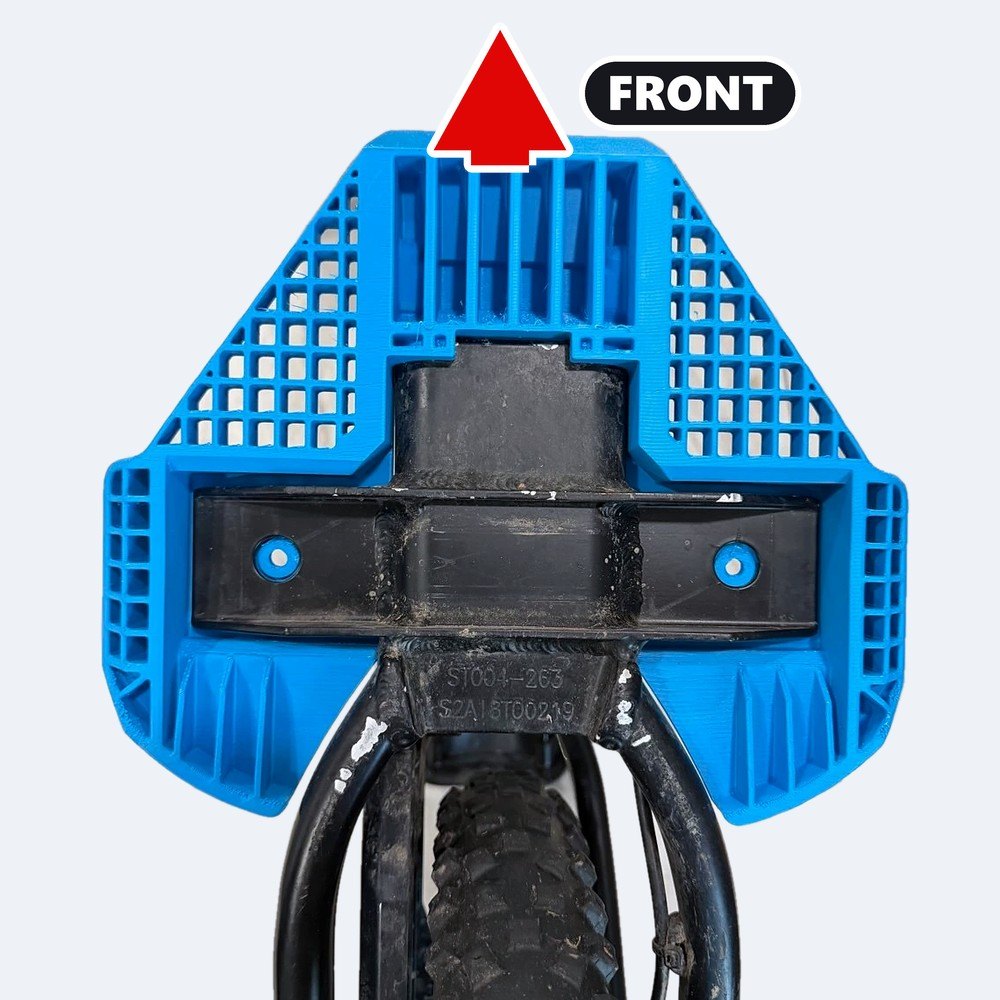
  • Rotate the footrest level.
  • Line up the counterbored hole in each wing with the hole in the steel plate.
Brace on
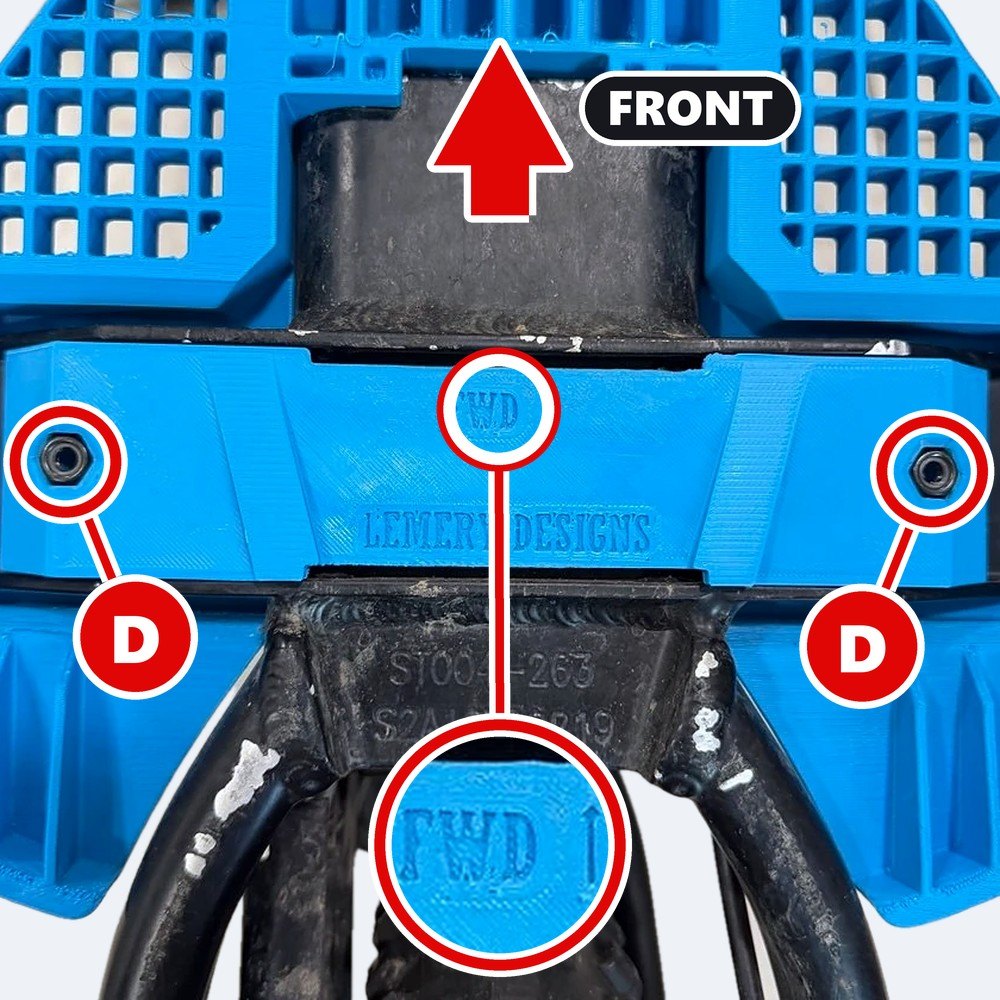
STEP12

Brace on

  • Place the brace across the plate.
  • The FWD ↑ arrow points to the FRONT.
  • Line up lock nuts D with the holes.
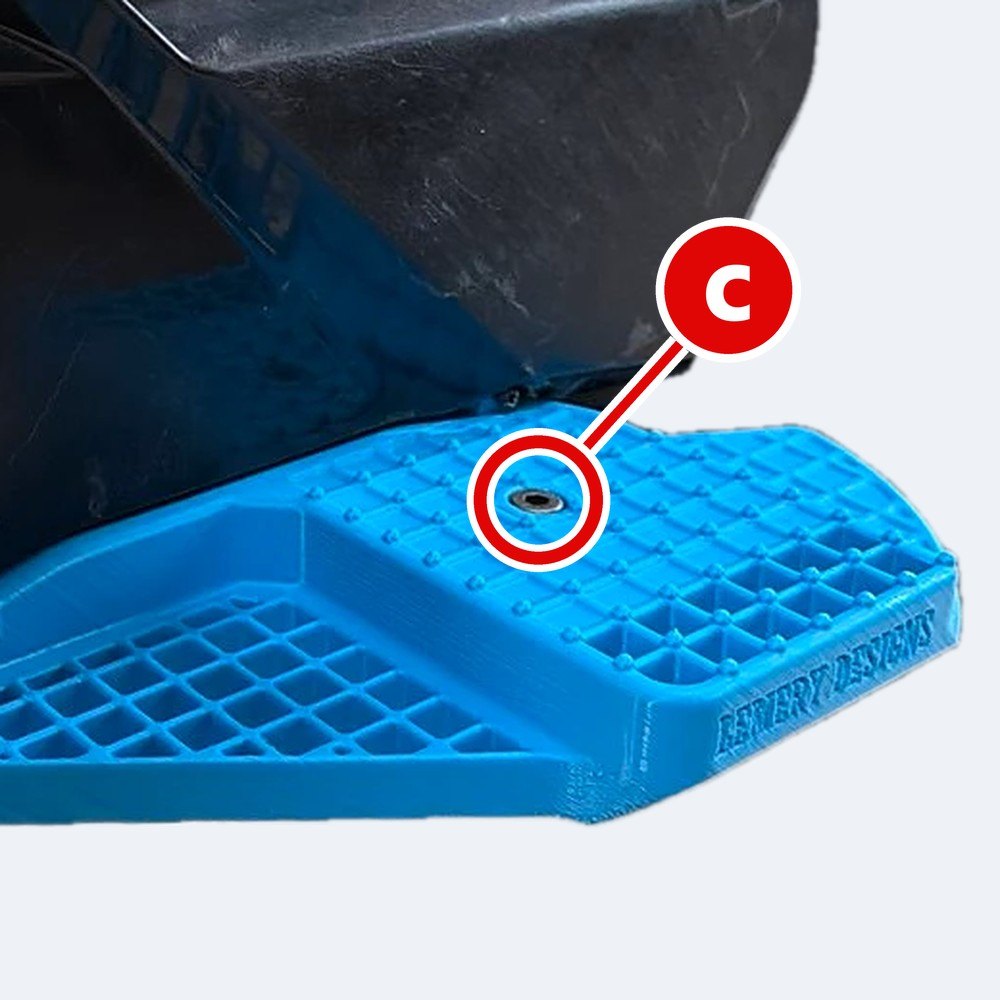
Start screws C
STEP13

Start screws C

  • With the bike still upside down, put screw C in from the top of each wing.
  • Turn it with the 4 mm hex key until it starts to thread into lock nut D.
  • Just start it. Don’t tighten yet.
TIPOnce both screws have started, they hold the brace in place.
STEP14

Flip it back

  • Turn the bike right side up.
C 4 mm
STEP15

Tighten screws C

  • Tighten both screws C with the 4 mm hex key until snug.
  • Stop as soon as the footrest is firm and does not move.
IMPORTANTDon’t over-tighten. Lock nuts D are held in plastic and can spin or pull out.
Side panels on
STEP16

Side panels on

  • Hold the motor controller (ESC) in place.
  • Slide the battery pins into both panels, facing the same way as before.
  • Push the panels together. Refit screws 1 to 8 with the #2 Phillips.
IMPORTANTCheck no wires are trapped behind the panels.
Test it
STEP17

Test it

  • Put the battery back in. Check the bike turns ON.
  • Push down hard on each side.
  • Nothing should move or flex.

Check before every ride

Need help?

Questions, missing parts or something not right? Email us before you ride.

Keep these instructions for future reference

CUSTOM BUILT. ENGINEERED RIGHT.
LD-STY-FP-002 · October 2026